
Baking a homemade pie is one of life’s greatest simple pleasures, but finding a reliable gluten free pie crust recipe can often feel frustrating. Many store-bought gluten free pie shells dry out quickly, crumble into dust when sliced, or lack the rich, buttery taste of traditional pastry.
If you have been searching for a flaky gluten free pie crust that handles easily and holds its shape during baking, this recipe is designed for you. By combining cold unsalted butter for rich flavour with vegetable shortening for structural stability, this gluten free pie dough rolls out smoothly between parchment sheets without tearing or breaking. Whether you need a blind-baked gluten free crust for a silky cream pie, a sturdy base for a weekend quiche, or a traditional double-top layer for a classic apple pie, this versatile gluten free dessert recipe for pie crusts delivers tender, golden results every time.
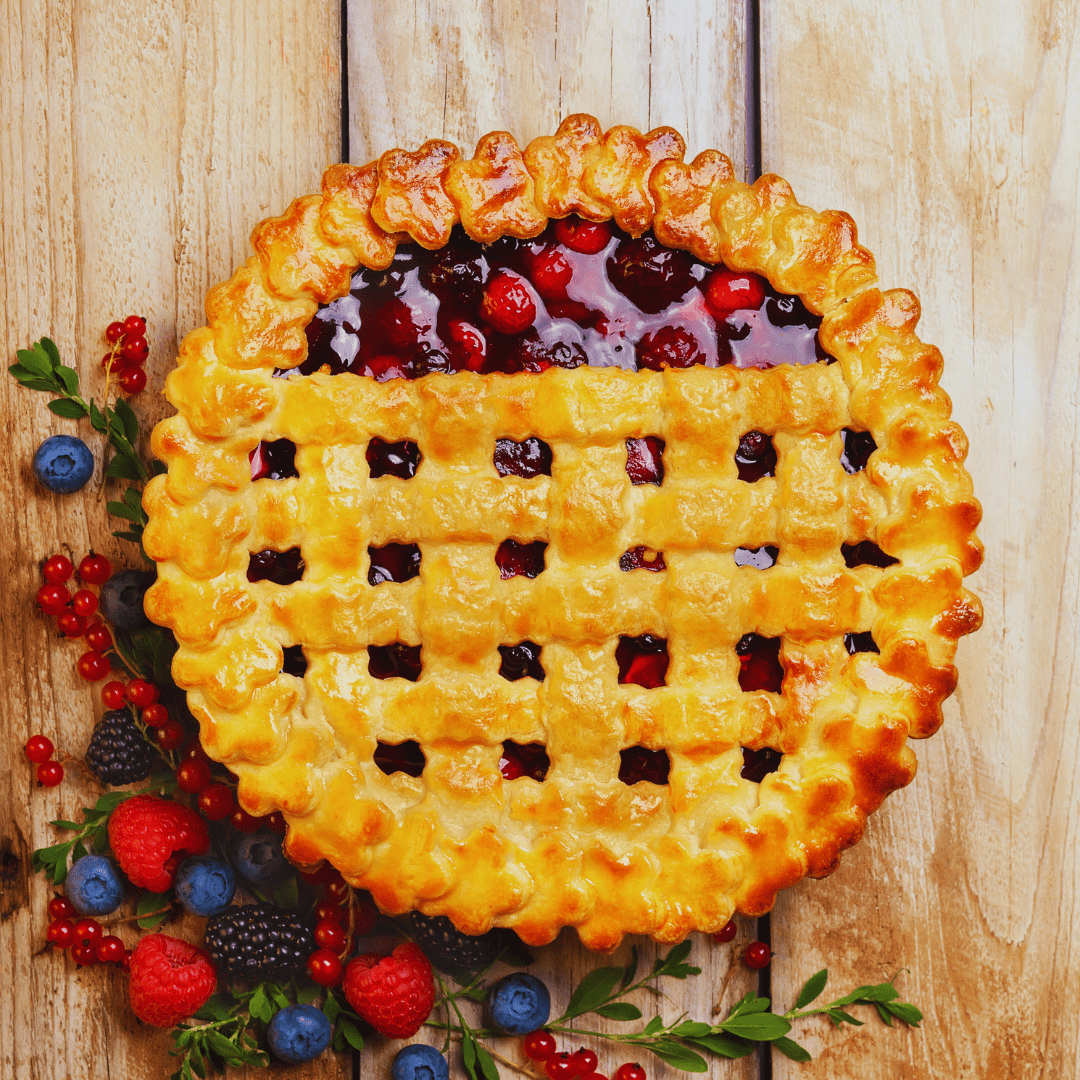
Gluten Free Pie Crust Recipe
Ingredients
- 2 ½ cups all purpose flour gluten free
- 2 teaspoons sugar
- 1 teaspoon salt
- ½ cup unsalted butter cold & cubed
- ½ cup vegetable shortening cold & cubed
- ½ cup ice water

Instructions
- In a large mixing bowl, sift the flour, add sugar, and salt until well combined.2 1/2 cups all purpose flour, 1 teaspoon salt, 2 teaspoons sugar
- Add the cold cubed butter and cold vegetable shortening.1/2 cup unsalted butter, 1/2 cup vegetable shortening
- Using a pastry cutter or fork, cut them into the dry ingredients until you have small pea-sized crumbs
- Slowly drizzle in one tablespoon of ice water at a time and gently mix it in until the dough starts to come together.1/2 cup ice water
- Turn the dough out onto a lightly floured surface and pack it into a ball.
- Cut the dough in half and flatten it into two discs.
- Cover each one tightly with plastic wrap and refrigerate for at least one hour.
Baking Pie Crust
- Roll the dough out to 12 inches in diameter, transfer the dough to a 9-inch pie plate, gently fit it in, trim any excess dough, and decorate the edges.
- Line the pie dough with parchment paper or foil, making sure to cover the bottom and the sides, then fill with pie weights
- Bake with the pie weights at 400°F (190°C) for 15 minutes.
- Remove from the oven, remove the parchment paper (or foil) and the pie weights.
- Prick the bottom of the pie crust with a fork to prevent bubbling and return to the oven.
- For a partially baked pie crust: Return the crust to the oven and bake for another 5 minutes or until the bottom of the crust looks dry.
- For a fully baked pie crust: Return to the oven and bake for 15-20 minutes or until golden brown and cooked through.
Notes
Nutrition
The Secrets to Mastering Gluten Free Pie Dough
Creating a delicate pastry without gluten requires an understanding of how alternative flours interact with fats and liquids. In traditional baking, gluten strands stretch to form a net that traps steam, creating flaky layers. When crafting a gluten free pie shell recipe, we rely on proper fat distribution, temperature control, and binding agents to replicate that texture.
The Ideal Fat Ratio: Butter vs. Shortening
Flavour and texture require different elements:
- Unsalted Butter: Delivers rich, authentic bakery taste and contains water. As the butter melts during baking, that water converts to steam, creating air pockets that form a flaky gluten free pie crust.
- Vegetable Shortening: Has a higher melting point than butter, allowing the gluten free pie dough to retain its structural integrity while rolling and baking. It prevents the edges of your gluten free pie shells from shrinking or slumping down the sides of the pan.
Using a 50/50 mix of cold butter and cold vegetable shortening gives you the best of both worlds: rich flavour alongside a pliable, easy-to-work dough.
Choosing the Right Gluten Free Flour
Not all gluten free flour blends perform equally in pastry baking. For this gluten free recipe for pie crust, use a 1:1 measure for measure gluten free baking flour blend that contains xanthan gum. Xanthan gum provides the elasticity needed to make your gluten free crust rollable without cracking. Look for blends based on white rice flour, brown rice flour, and tapioca starch for a neutral taste and smooth texture.
Step-by-Step Instructions
Step 1: Prep Ingredients & Chill Tools
- Measure carefully: Spoon your 1:1 gluten free flour blend into measuring cups and level off with a knife.
- Keep everything cold: Ice water is essential. Cubed butter and vegetable shortening should be kept in the refrigerator or freezer until the exact moment you add them to the dry mix. Cold fats create distinct layers in your gluten free crust.
Step 2: Cut the Fats into the Dry Blend
Sift 2 ½ cups of gluten free flour into a large mixing bowl, then whisk in 2 teaspoons of sugar and 1 teaspoon of salt. Add the ½ cup of chilled, cubed unsalted butter and ½ cup of cold vegetable shortening.
Using a pastry cutter or two knives, cut the fats into the flour until the mixture forms pea-sized crumbs. Having small, intact pieces of fat coated in flour is what guarantees a flaky gluten free pie crust.
Step 3: Add Ice Water Gradually
Drizzle ½ cup of ice-cold water over the flour and fat mixture one tablespoon at a time. Gently toss the mixture together using a fork. Add just enough water so the gluten free pie dough holds together when pressed between your fingers. Avoid over-hydrating, as excess liquid makes the baked crust tough.
Step 4: Shape and Chill
Divide the dough into two equal disks if making two gluten free pie shells (or one double-crust pie). Wrap each disk tightly in plastic wrap and chill in the refrigerator for at least 1 hour. Chilling relaxes the dough and lets the rice flours absorb moisture evenly.
Step 5: Roll and Fit into the Pan
Place one chilled disk of gluten free pie dough between two sheets of parchment paper. Roll outward from the center into a 12-inch circle about ⅛-inch thick. Peel off the top sheet of parchment, invert the dough over a 9-inch pie pan, and gently peel away the remaining parchment. Press the dough into the bottom and sides without stretching it. Trim edges to a ½-inch overhang and crimp as desired.
Pro Tips for Baking Success
- Blind Baking (Par-Baking): If your recipe calls for a pre-baked shell (like pumpkin or chocolate cream), line the unbaked gluten free pie shell with parchment paper, fill with pie weights or dried beans, and bake at 375°F (190°C) for 15 minutes. Remove weights and bake for an additional 8–10 minutes until light golden.
- Avoid Edge Shrinkage: Always rest your dough in the refrigerator inside the pie dish for 15 minutes before baking to set the fats in place.
- Preventing Soggy Bottoms: Brush the base of your unbaked gluten free crust with a thin layer of egg white before adding wet fillings.
Frequently Asked Questions About This Recipe
If your gluten free pie dough crumbles, it usually lacks sufficient moisture or binder. Ensure your flour blend contains xanthan gum. If it does, try adding an extra tablespoon of ice water during mixing, or let the dough sit wrapped in the fridge longer so the flour can fully hydrate.
Yes! Substitute the unsalted butter with a high-quality vegan block butter (such as Miyoko’s or Earth Balance sticks) kept very cold. Combined with vegetable shortening, this substitution creates completely dairy-free and vegan gluten free pie shells.
Yes. Xanthan gum acts as a gluten replacement, providing structural flexibility so your gluten free crust can roll without snapping. If your flour blend lacks xanthan gum, add ¼ teaspoon of standalone xanthan gum to the dry ingredients.
Absolutely. Roll out the dough, fit it into an oven-safe pie dish, crimp the edges, and wrap tightly in plastic wrap and foil. Freeze for up to 3 months. Bake directly from frozen, adding 2–3 extra minutes to your baking time.
Crust shrinkage happens when the fat melts before the structure sets, or if the dough was stretched tightly into the pan. Press the dough gently into the corners without stretching it, and freeze the shaped shell for 15 minutes before baking.
This specific gluten free pie shell recipe is designed for a 1:1 gluten free all-purpose flour blend. Replacing it entirely with almond flour will result in an overly wet, oily dough because nut flours lack the starch structure required for this ratio of fats.
Blind-bake (par-bake) your gluten free pie crust for 10–12 minutes before adding wet fillings like quiche or pumpkin. Brushing the bottom with egg wash before par-baking creates a protective barrier against moisture.
Roll the dough between two sheets of parchment paper or plastic wrap. This eliminates the need for excess rolling flour (which dries out gluten free pastry) and makes transferring the soft dough into your pie dish effortless.
Yes. Prepared gluten free pie dough disks can be stored wrapped in plastic wrap in the refrigerator for up to 3 days. Let the dough sit at room temperature for 10–15 minutes before rolling if it feels too hard.
Gluten free flours do not brown as quickly as wheat flour. Brush the top or edges of your flaky gluten free pie crust with an egg wash (1 egg beaten with 1 tablespoon water) or a light brush of milk before placing it in the oven.
Yes! This recipe is ideal for savoury pies, quiches, and chicken pot pies. If making a strictly savoury dish, you can reduce the sugar in the dry ingredients from 2 teaspoons down to 1 teaspoon.

What’s a substitute for evap milk?
When do you add the pumpkin filling to the crust? Half baked, no bake?
Hi Sandy,
The best substitutes for evaporated milk are regular milk, non-dairy milk, half and half, heavy cream, and powdered milk. All of these ingredients can be used when a recipe calls for evaporated milk. You can almost use any kind of milk instead of evaporated milk with a little tweaking.
When using a frozen pie shell, we half baked. When using a fresh pie shell, no baked. Both worked great.
I’ve made this several times. It comes out perfect every time. The first few times I used it to make pecan tarts. Tonight I used it to make sausage rolls and OMG, they were so good. I’m obsessed with this crust, it’s buttery, flakey and delicious.
The best pie crust I have ever made.
This really is a foolproof recipe. Try hard as I might, it was impossible to overwork, which usually happens with the strips on a lattice top pie. The final product was light, tender, and flaky with just the right amount of crispness. This is now my go to for all pie crust needs.
This was the most delicious pie crust I’ve ever made. Used it for a chicken pot pie and this will be my go to recipe from now on. Thanks!
This pie crust is so easy to work with.
OMG, I have searched for years and finally found a pie crust that worked the first time and everytime. I really mean it! I have made at least 50 pies with minor success and mostly complete failures. I’ m happy enough to leave a comment which I have never done before. Thanks sooo much! James
Pot pies are without a doubt top of my list of favorite foods. Decided to make my first one today. Needed a pie crust recipe and came across yours. I was expecting less than perfect results for sure. Followed your instructions, crossed my fingers and hoped it was at least edible. It turned out amazing! Crispy, buttery, flakey, layered goodness!
Beautiful tasty pie crust!! Made a gluten free quiche with half and froze the other.
This was absolutely the easiest pie crust ever, if I can do it, you can do it.
Used this gluten free pie crust for pumpkin pie this Christmas. It was flaky & no complaints from the entire table. Thank you!
Great recipe!
Delicious. Was so good for my chicken pot pie!
So fast and easy! I made a strawberry pie with this crust recipe. Sooooo delicious!
Finally a pie crust recipe that can be a permanent bookmark in any home recipe book. Thank you!
All my life I have bought my pie crust because of people telling me how difficult it was to do. I decided to give it a try after 40 years of buying premade crust. Never ever will I buy premade. So easy! The tips others gave with shaving cold butter into small pieces and using hands to mix, made the process soooooo EASY!!! Delicious💕
I helped my daughter make this for the first pie she had ever made herself. She was able to make this herself and when it was done the crust for her cherry pie was perfect!
I used this recipe for my first attempt at a double-crust apple pie, and it turned out beyond my expectations! Rolling the dough between sheets of parchment paper made all the difference, it did not tear or crack at all. The crust baked up beautifully golden and had actual flaky layers.
Finding a reliable gluten free recipe for pie crust that does not turn into a crumbly mess is so rare. The combination of butter and shortening gives it a great rich taste while keeping the structure intact. I blind-baked a shell for a custard pie and the bottom stayed perfectly crisp.
This is by far the easiest gluten free pie dough I have worked with. It was super pliable, easy to crimp along the edges, and held its shape in the oven without slumping down the dish. My non-gluten-free family members could not even tell the difference when I served it with spiced fall apples.
I have been searching for a solid gluten free pie shell recipe for a while, and this one hit the mark. The instructions on chilling the fats and adding ice water gradually made the process smooth and stress-free. It turned out flaky, light, and tender.
Made two gluten free pie shells with this dough over the weekend, one for an apple galette and one to freeze for later. The pastry rolled out effortlessly, tasted wonderfully buttery, and held up to a heavy fruit filling without getting soggy on the bottom.
Most store-bought gluten free crust options taste dry and cardboard-like, but this homemade version is incredible. The texture is legitimately flaky and the flavor is spot on. It is definitely going to be my go-to crust for all my upcoming autumn baking.
I converted this into a dairy-free version using cold vegan block butter alongside the shortening as suggested, and it worked like a charm! The dough was easy to handle, shaped nicely, and baked into a delicate, delicious crust.