
Discover how to make thick, fudgy gluten free brownies with shiny crinkle tops using simple pantry staples. This easy to make brownies recipe covers the essential science of gluten free chocolate baking, including flour hydration, fat ratios, and Celiac Disease safe ingredient selection.
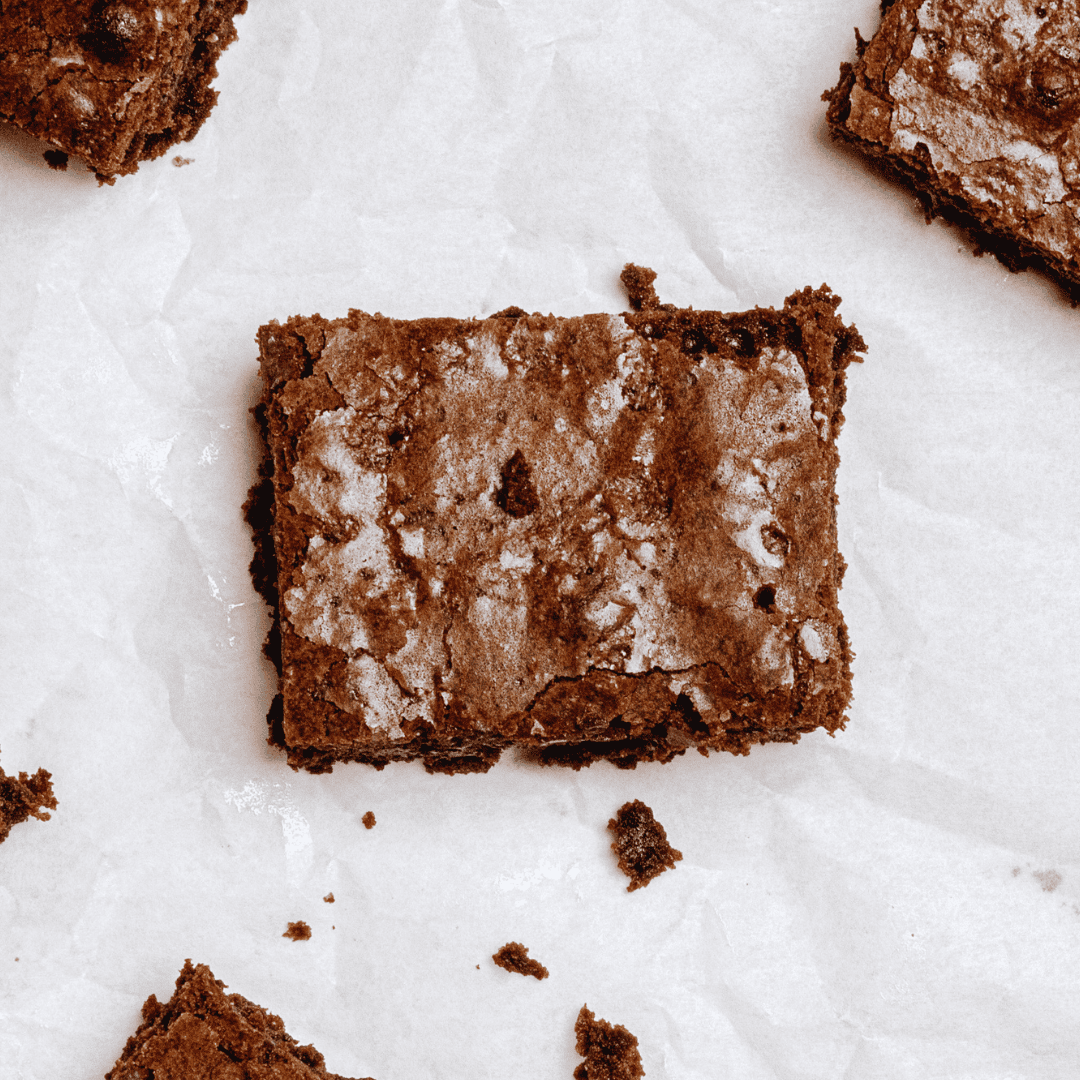
Gluten Free Brownies Recipe
Ingredients
- 12 tablespoons unsalted butter - 170g – cut into pieces
- ½ cup semisweet chocolate chips - 100g – chopped
- ½ cup natural cocoa powder - unsweetened (50g)
- ¾ cup sugar - 150g
- ¾ cup light brown sugar - 150g – firmly packed
- 2 large eggs
- 1 large egg yolk
- 1 teaspoon vanilla extract
- ½ teaspoon salt
- 1 cup all-purpose gluten free flour - 125g
- ¾ cup semisweet chocolate chips - 150g
- 1 cup walnuts - chopped – optional
- ½ cup caramel drizzle - optional

Equipment
Instructions
- Preheat oven to 350F and line a 9×9 baking pan with parchment paper
- Combine butter and ½ cup semisweet chocolate chips in a large, microwave-safe bowl.12 tablespoons unsalted butter, ½ cup semisweet chocolate chips
- Microwave for 30 seconds.
- Stir well, microwave for another 15 seconds and then stir well again.
- Repeat for 15 seconds until chocolate and butter are completely melted and well-combined.
- Add cocoa powder, stir well.½ cup natural cocoa powder
- Add sugars, stir until completely combined.¾ cup sugar, ¾ cup light brown sugar
- Add eggs, one at a time.2 large eggs, 1 large egg yolk
- After each addition, stir well, and then stir another 30 seconds.
- Stir in vanilla extract and salt.1 teaspoon vanilla extract, ½ teaspoon salt
- Add gluten free flour, stir until completely combined.1 cup all-purpose gluten free flour
- Stir in chocolate chips and walnuts (optional).¾ cup semisweet chocolate chips, 1 cup walnuts
- Spread into prepared 9×9 pan.
- Bake on 350F (177C) for 30-35 minutes or until a toothpick inserted in center comes out slightly fudgy, but not wet with batter.
- Allow to cool before cutting and serving.1/2 cup caramel drizzle
Notes
Nutrition
The Science of the Perfect Gluten Free Brownie Texture
When living with Celiac disease or gluten sensitivity, finding a homemade treat that delivers an authentic bakery texture without compromising on flavour is the ultimate baking win. Gluten free baked goods often get a bad reputation for being dry, crumbly, or overly gummy. Fortunately, brownies are one of the most forgiving and successful desserts to convert to a gluten free lifestyle.
Because brownies rely heavily on fat, eggs, and melted chocolate for structural integrity rather than a gluten protein network, achieving a dense, fudgy core is easily within reach. The secret lies in balancing moisture retention, choosing the right cocoa products, and giving your batter the proper rest time before baking.
How to Make Brownies Gluten Free: The 4 Golden Rules
If you are wondering how to make brownies gluten free without sacrificing that rich chocolate flavour or classic chewy bite, follow these four foundational rules:
1. Choose a Quality 1-to-1 Baking Flour
The simplest way to make gluten free brownies from scratch is by substituting standard all-purpose wheat flour with a 1-to-1 gluten free measure-for-measure baking blend. Look for blends containing rice flour, tapioca starch, and potato starch. Ensure your blend contains xanthan gum, which acts as a structural binder in place of gluten, preventing your brownies from falling apart when sliced.
2. Master the Fat-to-Flour Ratio
Gluten free flours absorb moisture differently than wheat flour. To keep brownies ultra-fudgy rather than cakey, increase the liquid fat content slightly. Using a combination of melted real Canadian butter and chopped high-quality semi-sweet chocolate chips creates a rich emulsion that keeps the crumb moist for days.
3. Allow the Batter to Hydrate
Gluten free grain flours (especially white and brown rice flour) take longer to absorb liquids and fats. Once your batter is mixed, let it sit in the pan at room temperature for 10 to 15 minutes before placing it in the oven. This crucial step softens gritty rice grains and produces a uniform, silky mouthfeel.
4. Beat the Eggs with Sugar for the Signature Crinkle Top
That coveted paper-thin, glossy, crinkly top on a brownie comes from dissolving sugar into beaten eggs. Whisk your eggs and granulated sugar vigorously together for 2–3 minutes until pale and slightly frothy before folding in your melted chocolate mixture and dry ingredients.
Essential Ingredients for Canadian Gluten Free Bakers
- Gluten Free Flour: A 1:1 cup-for-cup substitute containing xanthan gum.
- Unsalted Butter: Canadian butter provides a rich fat base that keeps the center soft.
- Dutch-Process Cocoa Powder & Semi-Sweet Chocolate: Combining cocoa powder for deep earthy notes with melted chocolate chips yields the best flavour profile.
- Large Eggs: Room temperature eggs bond best with melted fat.
- Pure Vanilla Extract & Sea Salt: Salt enhances the chocolate intensity, while vanilla balances the bitterness.
Step-by-Step Baking Method
- Prep & Melt: Preheat your oven to 350°F (175°C). Line an 8×8-inch baking pan with parchment paper. Melt the butter and chopped chocolate together over low heat or in short microwave bursts until smooth.
- Whip the Base: In a large bowl, whisk room-temperature eggs and sugar until pale and thick.
- Combine: Slowly stream the melted chocolate-butter mixture into the eggs while whisking continuously.
- Fold: Gently fold in the gluten free flour blend, cocoa powder, and sea salt with a silicone spatula until just combined.
- Rest & Bake: Pour into the prepared pan, let the batter rest for 15 minutes, then bake for 30–35 minutes until the edges are set and a toothpick inserted into the center comes out with a few moist crumbs.
- Cool Completely: Resist the urge to slice immediately! Gluten free brownies require cooling time to set their structure.
Frequently Asked Questions About This Recipe
How do you keep gluten free brownies from being gritty?
Grittiness is caused by unhydrated rice flour in gluten free baking blends. To eliminate grittiness, let your mixed brownie batter sit in the pan for 15 minutes at room temperature before baking so the starches can fully absorb the liquid ingredients.
Why are my gluten free brownies crumbly?
Crumbly brownies usually result from a lack of binder or over-baking. Ensure your 1:1 gluten free flour blend includes xanthan gum, and avoid over-measuring your dry ingredients. Using a digital kitchen scale yields the most consistent result.
Can I make these dairy-free as well as gluten free?
Yes! Replace the unsalted butter with a 1:1 dairy-free block butter alternative or refined coconut oil, and ensure your chocolate chips are certified dairy-free and gluten free.
How do I store homemade gluten free brownies?
Store cooled brownies in an airtight container at room temperature for up to 4 days. You can also freeze individual slices wrapped tightly in parchment paper and foil for up to 3 months.
Sooo good and quick to make! Perfect brownie texture, but I added pecans because I love them.
Wowzers, my daughter made these for our family, SO surprised how amazingly deliciouse these were!! Asked her which recipe she followed and she got me right too it so I can make them this time!!! Is it brownie time yet!?!? YUMMY!
I made this for the first time and doubled the recipe. It took a bit longer to bake. They were a huge hit! Will definitely be making these brownies again and again!!!
First time I ever baked a dessert on my own. They were so delicious. My family love it. It was delicious 😋
These are incredible!! Baked them in silicone molds and turned out fantastic. Thanks for sharing!
delicious and fudgy indeed!
These were really delicious gluten free brownies. Thank you for the easy recipe 🙂
I added caramel swirls and caramel sauce to mine and so good!
Loooove these brownies!!! Totally awesome in a pinch and they barely last in my home! I’ve made them almost 3 times this week as a treat not just because we love them but because they’re just so darn easy to make! Lots of love and many thanks 🙂
This really is the best brownie recipe. I do a lot of baking and cooking. My taste in sweets leans towards everything but chocolate. Once in awhile I do get a sudden craving for something dense and chocolate. I am delighted. It’s delicious. It’s simple. It’s dark and rich and fulfills every chocolate craving. I’ve made it quite a few times since the first and mostly to serve other people. It has never failed to be eaten with delight, and I’m so glad your recipe is the one that caught my eye. Thank you for sharing the best gluten free brownie I’ve ever eaten or baked.
I never leave comments online after using a recipe. I usually just save and move on. But I stumbled across this one and just used it today. Me and my toddler took one bite and simultaneously said Mmm. I had to come back To leave a comment. Hands down the best gluten free brownie recipe I have ever tried.
love how perfect the texture and flavor is
Made these a few weeks ago with just 1 cup of sugar and they were still delicious- just topped with a dusting of powdered sugar. The family loved them and they were gone in a few days.
These brownies were perfect! I had a midnight craving last night and decided to make them. They turned out so good, nice and gooey on the inside, and crispy on the exterior.
This recipe is wonderful
I had never made “homemade” brownies before…(at 54 years old, lol).
Theses were super easy and OH my goodness yummy! Thank you for the recipe. I will never do a boxed brownie again!
These are the best gluten free brownies I have ever made. I usually double the batch and make it for just about every dinner I’m invited to. I have always had people comment on how good they are and a few have called them “the best brownies in the world.”
They didn’t last 24 hours in my house. Five stars for being easy, delicious, and celiac disease safe!
Absolute chocolate perfection!
Made these over the weekend for a family gathering and they disappeared in minutes! I used a standard 1:1 gluten-free flour blend and swapped the butter for a dairy-free block alternative, and they turned out remarkably rich and chewy with crisp edges. Finding a scratch recipe this foolproof is rare in gluten free baking. Thank you Gluten Free Journey for saving dessert night!
I’ve been diagnosed with Celiac disease for three years now, and brownie recipes are usually a hit-or-miss disaster—either way too cakey or gritty from the rice flour. I followed the tip in this post to let the batter sit in the pan for 15 minutes before baking, and WOW. Total game-changer! The texture was incredibly fudgy, and that crinkle top was perfection. My husband (who eats gluten) couldn’t even tell the difference. This is going straight into my weekly baking rotation!