
The Gluten Free Chocolate Cream Pie: A Make-Ahead Showstopper
There is something undeniably magical about a true chocolate cream pie. With a texture that bridges the gap between a rich chocolate mousse and a velvety custard, it is the kind of dessert that commands complete silence at the dinner table. When you want to impress guests or treat your household to something truly indulgent, without spending hours hovering over a hot oven, this classic gluten free chocolate cream pie is your answer.
Best of all, pairing a luxurious, scratch-made filling with a convenient, store-bought Mi-Del gluten free graham style pie crust means you get all the bakery-quality decadence with a fraction of the effort. Let us dive into why this gluten free dessert recipe deserves a permanent spot in your baking repertoire, along with a few pro tips to ensure absolute perfection every single time.
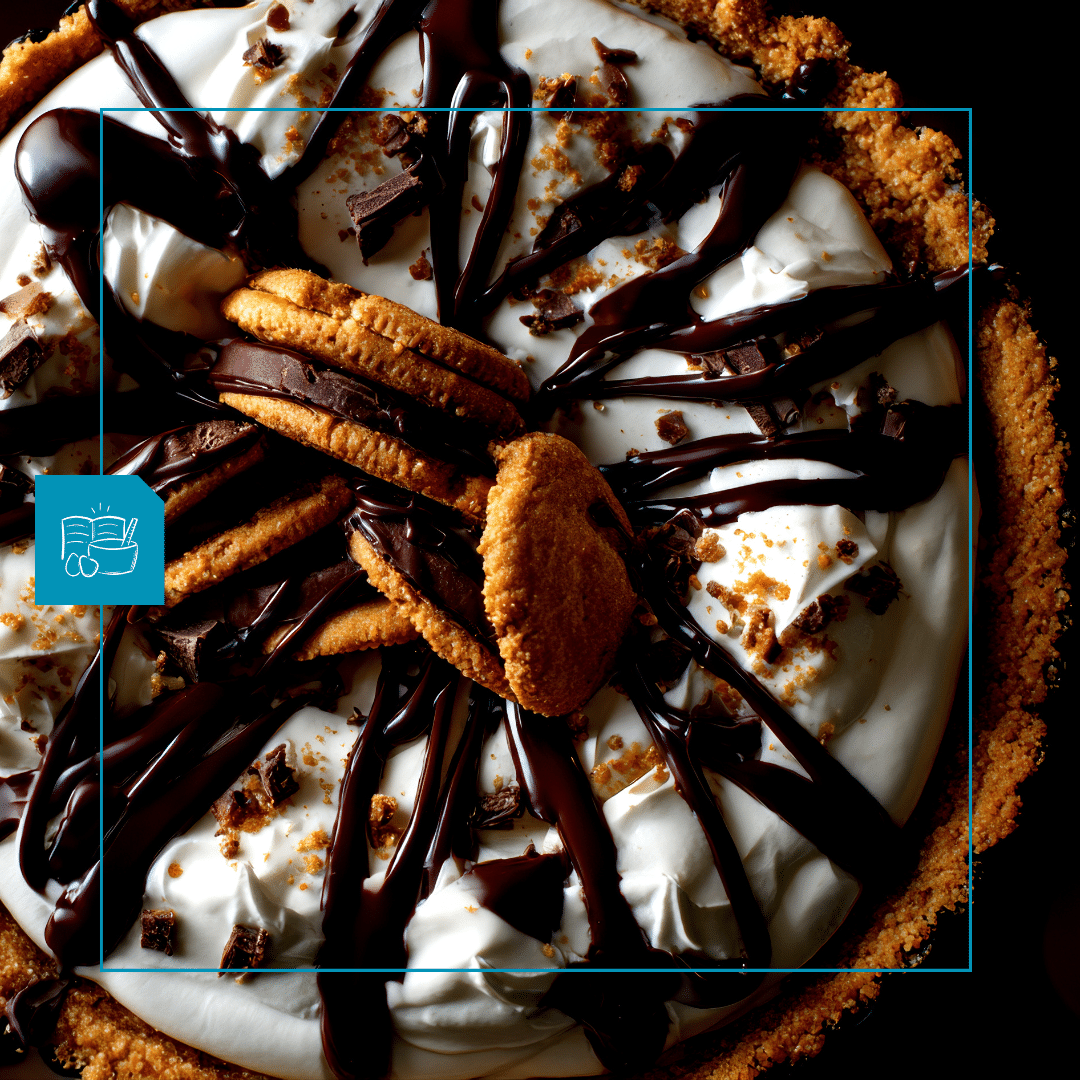
No-Bake Gluten Free Chocolate Cream Pie Recipe
Ingredients
- 1 Mi-Del Gluten Free Graham Style Pie Crust - ready-made
- 6 oz dark chocolate (60–70%), finely chopped - 170 g finely chopped
- 1 can coconut milk - 13.5 oz full-fat – shake well before using, or use canned coconut cream for a richer result)
- 3 tablespoons granulated sugar
- 2 tablespoons cornstarch - acts as the thickener since we are omitting eggs
- 1 tablespoon coconut oil or vegan butter
- 1 teaspoon pure vanilla extract
- pinch sea salt
- ½ cup aquafaba - Optional for extra fluffiness: liquid from a can of chickpeas whipped with 1/4 tsp cream of tartar until stiff peaks form, to gently fold in at the end.

Instructions
Whisk Base Ingredients:
- In a medium saucepan (off the heat), whisk together the full-fat coconut milk, granulated sugar, cornstarch, and pinch of sea salt until completely smooth with no lumps.1 can coconut milk, 3 tablespoons granulated sugar, 2 tablespoons cornstarch, pinch sea salt
Thicken on the Stove:
- Place the saucepan over medium heat, whisking constantly. Bring the mixture to a gentle simmer. Continue to cook and whisk vigorously for 2 to 3 minutes until the mixture thickens significantly into a smooth, pudding-like consistency.
Melt the Chocolate & Butter:
- Remove the saucepan from the heat. Add the finely chopped dairy-free dark chocolate, vegan butter (or coconut oil), and vanilla extract directly into the hot coconut mixture. Let it sit for 1 minute to melt the chocolate, then whisk everything together until smooth, glossy, and fully incorporated.6 oz dark chocolate (60–70%), finely chopped, 1 tablespoon coconut oil or vegan butter, 1 teaspoon pure vanilla extract
Pour and Set:
- Pour the warm chocolate filling directly into your Mi-Del Graham Style Pie Crust. Smooth the top with a spatula.1 Mi-Del Gluten Free Graham Style Pie Crust
Chill:
- Cover the pie loosely and place it in the refrigerator for at least 4 hours (or overnight) until the filling is firmly set and chilled through.
Top and Serve:
- Just before serving, dollop or pipe your prepared dairy-free whipped cream over the top, garnish with dairy-free chocolate shavings, and slice!1/2 cup aquafaba
Why a No-Bake Filling Shines with a Gluten Free Crust
When working with gluten free pie crusts, particularly convenient pre-made options like the Mi-Del graham style crust, managing moisture and baking times can sometimes feel like a tightrope walk. Traditional gluten free pastry crusts can be prone to crumbling or becoming overly fragile if subjected to high, prolonged baking temperatures.
By utilizing a stovetop-and-refrigerator method, this recipe completely bypasses the need to bake the crust. The filling is gently cooked and thickened on the stove, whipped to airy perfection, and poured directly into the cool, crisp shell. As the pie chills for four hours (or overnight), the filling firms up into a sliceable, dream-like consistency while keeping the graham-style crust crisp, sturdy, and completely intact.
The Secret to That Signature Silky Texture
Achieving that iconic, glossy mouthfeel without turning to heavy starches or gelatins comes down to technique and temperature control. In a traditional French silk style pie, the secret lies in how you treat the eggs and sugar.
By gently whisking whole eggs, sugar, and a splash of water over a double boiler, you achieve two vital goals simultaneously:
- Safe Pasteurisaton: Bringing the egg and sugar mixture to about 60°C (140°F) gently pasteurises the eggs, ensuring food safety while completely dissolving the sugar crystals so you never end up with a grainy texture.
- The Ribbon Stage: Transferring that warm mixture to a mixer and whipping it aggressively for several minutes incorporates millions of microscopic air bubbles. This triples the volume, creating a light, airy base that folds seamlessly into rich, melted dark chocolate and softened butter.
The result? A dessert that feels light as a feather on the palate while delivering an intensely satisfying, deep chocolate flavor.
Tips for Success in Your Kitchen
Even the simplest recipes benefit from a few tried-and-true kitchen secrets. Keep these points in mind as you prep your pie:
- Quality Matters: Because chocolate is the star of the show, choose a good quality bittersweet or semi-sweet chocolate (around 60% to 70% cacao). Avoid baking chips if possible, as they often contain stabilizers that prevent smooth melting; opt instead for fine baking bars.
- Room Temperature is Key: Ensure your butter is properly softened before mixing it into the melted chocolate. Cold butter will cause the warm chocolate to seize up, creating tiny solid flecks rather than a glossy emulsion.
- Patience with Chilling: Do not rush the refrigeration process. Giving the pie a full four hours, or better yet, an entire night in the fridge, allows the fats in the butter and chocolate to set firmly, ensuring clean, beautiful slices every time.
- The Whipped Cream Finish: Whip your heavy cream just until soft, pillowy peaks form. A dollop of homemade vanilla whipped cream cuts through the rich chocolate and adds a gorgeous contrast in texture and color.
Customising Your Creation
While the classic chocolate-and-graham combination is timeless, this easy dessert recipe acts as a versatile canvas for your own culinary creativity.
If you want to elevate the presentation for a special gathering, consider garnishing the top with more than just chocolate shavings. A scattering of toasted, finely chopped pecans or hazelnuts adds a lovely crunch that mirrors a traditional crust. Alternatively, a light dusting of espresso powder over the whipped cream enhances the chocolate notes, adding a sophisticated mocha depth that coffee lovers will adore.
For a festive winter touch, try adding a tiny pinch of cinnamon or a drop of pure peppermint extract to the filling. In the summer months, a garnish of fresh raspberries or strawberries provides a vibrant, tart pop of color and flavor that cuts right through the richness of the silk filling.
Serving and Storing Your Pie
This pie is an exceptional make-ahead candidate for dinner parties, holidays, or casual weekend treats. You can prepare it up to 24 hours in advance, keeping it safely covered in your refrigerator until dessert time. For the absolute best presentation, hold off on piping or spreading the whipped cream and adding chocolate shavings until just before slicing.
If you happen to have leftovers (though it is rare!), store them covered in the fridge for up to three days. The structure holds wonderfully, meaning slice number two will taste just as incredible as slice number one.
Grab your favourite mixing bowls, keep your Mi-Del crust ready on the counter, and get ready to enjoy a slice of pure, gluten free bliss!
Frequently Asked Questions About This Recipe
Yes, this pie is an exceptional make-ahead dessert. You can prepare it up to 24 hours in advance and keep it covered in the refrigerator. For the best presentation, wait to pipe or spread the whipped cream topping until just before serving.
Store any leftover pie covered tightly in the refrigerator for up to 3 days. Because the filling relies on whipped eggs and butter rather than gelatin, keeping it properly chilled ensures it maintains its velvety, sliceable texture.
Certainly. While a store-bought Mi-Del gluten free graham style pie crust makes prep wonderfully fast and convenient, you can easily substitute a homemade graham crust using crushed gluten free cookies and melted butter.
This gluten free recipe uses a stovetop method where the eggs, sugar, and water are gently heated over simmering water until they reach a safe pasteurizing temperature and dissolve the sugar crystals completely, before being whipped to a light, airy ribbon stage.